I’m a creative girl and, as such, I am always on the look out for inspiration and new ideas. I also love trying new crafts, and the more I can make to decorate and furnish my own home, the better.
So, inspired by Kirstie’s Homemade Home, and with half an idea about replacing our tired front door, Mark came up with possibly the best idea for a Christmas present ever; the opportunity for me to learn the skills to make my own stained glass panel.

The Levenshulme Market was the unlikely starting point to this venture. Whilst pottering round the stalls Mark and I bumped in to our neighbour and, for the first time in almost 5 years, we had a proper conversation.
Our neighbour, the lovely Sharon Campbell, of Manchester Stained Glass was manning a stall with her business partner Lauren Sagar. If my memory serves me right they were selling copper foiled glass flowers, art deco lamps, and advertising courses to learn how to make them. The lamps had featured in Kirstie’s show, which Mark and I had watched, somehow completely oblivious to the fact we were watching our neighbour on TV!
I also remember a conversation about the beautiful glass buttons for sale and whether they were better sold in sets of 4 or 5. I went for 5, odd numbers being pleasing on the eye, and bought a set for my Mother at the following market. Strange, the things you remember but anyway, this first meeting where we chatted about our mutual love of all things crafty, gave rise to an idea in Mark’s head. Unbeknown to me he arranged for Sharon to teach me how to make stained glass. I am sure he overstated my crafting abilities as it was arranged that I would attend a bespoke session over 2 Saturdays, during which I would learn the art of making stained glass, leaving open the opportunity for me to make a panel for the door at a later date.
Fitting in 2 Saturdays, whilst training to cycle 1000 miles through Italy, and for the Great Manchester Run, was no easy task and Sharon was adamant that the course needed to take place in warmer weather, which may tell you something about the studios. But I eventually found myself at the door to Rogue Studios, one Saturday morning, slightly nervous and very excited.
To be honest I was as thrilled to have the opportunity to poke around a real artists’ studio as I was to be learning about glass. I am so curious, ok nosey, when it comes to other people’s spaces and I loved the bohemian feel of the place, which presented the perfect environment to be creative and have a play.
After the essential safety briefing, necessary to stop you brushing glass particles up like biscuit crumbs, I started off by learning how to break chocolate. A quirky learning technique yet a good illustration of how to achieve a clean cut by breaking the glass with your thumbs.
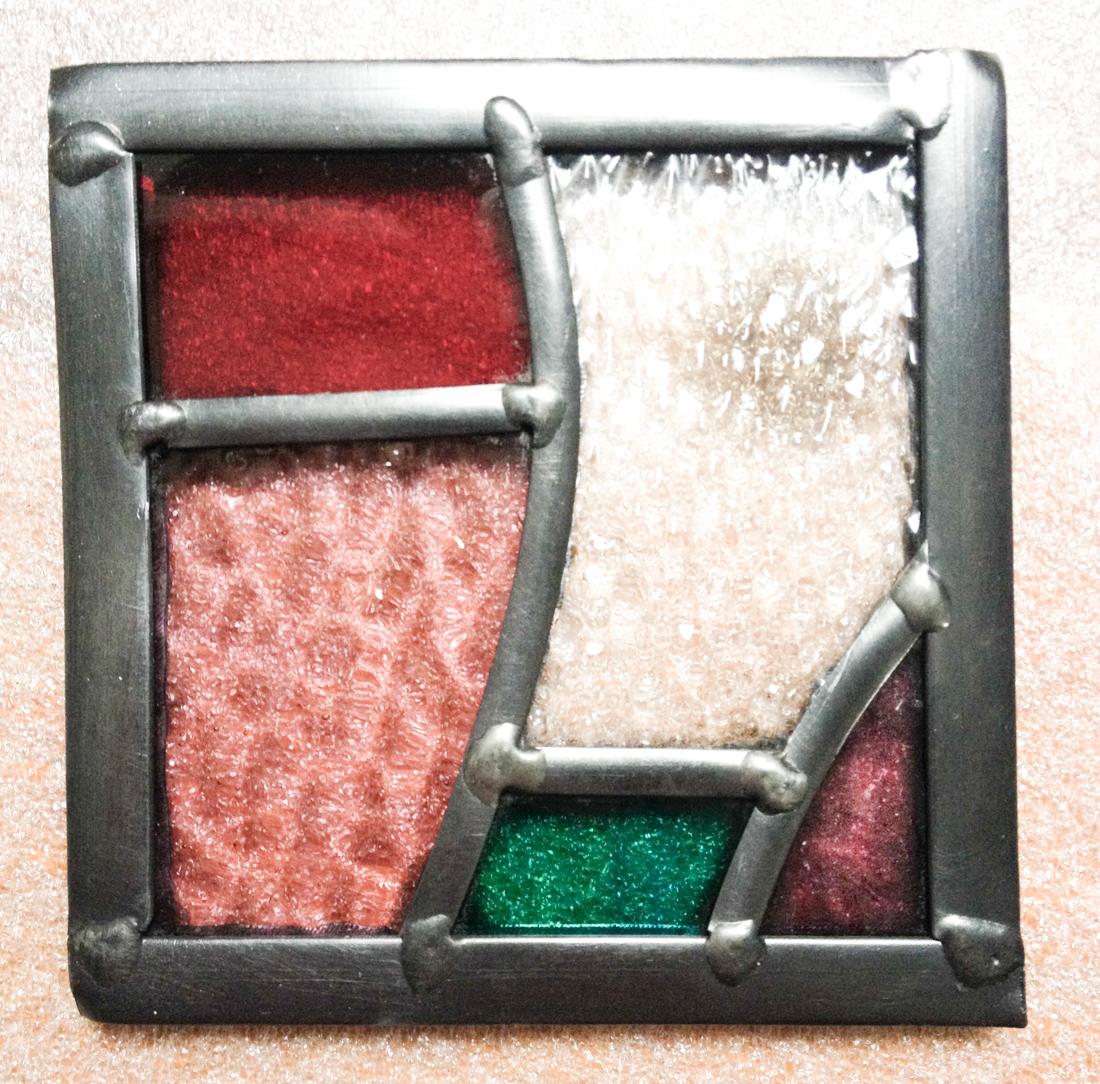
I was quickly working with the glass and I have to say, the first time you break glass with your bare hands, it feels kinda weird and kinda nerve wracking. It is also a lot of fun. I learned how to cut the glass for a small square panel, to teach me all the techniques I would need to make a bigger panel that I was to design myself.
My favourite part was selecting the glass from the amazing variety of colours and textures. Cutting everything to size was painstaking work, but I soon came to understand the importance of getting it right when it came to the leading..
Sharon described cutting lead as being like cutting cheese. I told her that I am terrible at cutting cheese – just ask the boy – and I don’t think my lead cutting technique was much better. I had to concentrate more on the leading than the glass cutting and I think the process of wrapping the glass in lead took me just as long. And, when it came to making it square, well let’s just say, my finished square was in many ways comparable to my cheese!
After refreshing my soldering skills, last used on a printed circuit board at school, Sharon showed me how to black the lead with grate polish, et voila, my first ever stained glass.
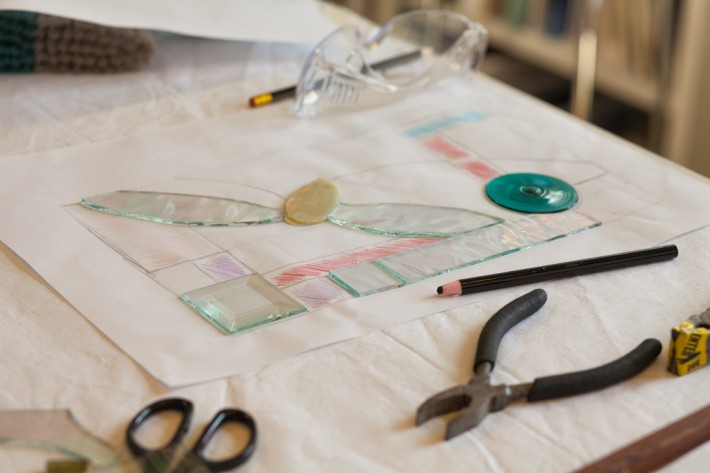
We just had time enough time left to discuss some ideas for my panel over tea and chocolate biscuits. I had scouted Pinterest and come up with a dragonfly motif. I wanted it simple in its colours and interesting in its texture. I had a quick lesson in how to draw a design suitable to make in glass, including a demonstration of shapes you can and can’t cut. With the promise of help if I needed it before session 2, I left with my glass creation, some sketched ideas, and some small glass shapes, the names of which escape me, that I had selected to incorporate in to my design.
Over the next few weeks I came up with a drawing, and then it was time to make it for real. Session 2, this time accompanied at the start by Mark, who fancied a play with his camera, and who captured the images featured in this post.
Very happy to be back in the studio, despite it being one of the first sunny days this year, I spent a happy half hour choosing the glass and selecting the best textures to set off the dragonfly. I am particularly taken with the opaque, yellow glass I used for the body, and the iridescent glass of the wings.

I quickly recalled my glass cutting technique and I was off. It took me most of the morning to cut all the glass, and some pieces required more effort than others – I think it’s assumed that there will be waste; the trick is to minimise this but I think that comes with practice.

When it came to the leading, Sharon showed me how to stretch the lead and prepare it for use. It took me ages to cut all the lead to size, and the hardest part for me was leading the wings. My difficulties however, gave me the opportunity to learn a few more tricks of the trade and play with some machinery to smooth the edges of the glass, where my cutting skills had left it difficult to fit some of the pieces. I had a lot of help from Sharon to make this piece square. It was definitely the hardest part for me to fit it all together, and a full day was surprisingly tiring. Eventually the glass was leaded and I had time to solder the joints. I decided not to black the lead, preferring the more subtle grey with the colours I had chosen.
So, with a new skill learned, although far from mastered, my house is now a showcase for my handmade light catcher.

I’m a long way from making a panel for my door, but I have the confidence to design something that will work, and who knows, maybe the dragon fly will be featuring on our front door soon.
If you fancy having a go yourself, Lauren and Sharon are running an 8 week evening course in Withington, costing £240. For more information visit manchesterstainedglass.co.uk


Leave a Reply